
How to monitor the Lucee ColdFusion Application Server in Solarwinds
How to monitor the Lucee ColdFusion Application Server in Solarwinds SAM
Kai Bosch, 19.03.2019
When developing and deploying complex CRUD-based webapps these days, there is an abundance of options to pick from concerning the language, servers and general architecture of the application stack. When picking the right components for your appstack, the decision should be made carefully based on important characteristics like security, availability, resource usage, scalability, update politics and of course ease of use and efficiency in development.Since many of these factors play a major role in the success or failure of a web application, each component should be picked carefully and be critically reevaluated from time to time.
Here at the web development works of heureka we have made the decision for an appstack with an Apache webserver and the FOSS implementation of the ColdFusion application development environment called Lucee at it’s heart. The Backend connects to a load-balanced cluster of MariaDB instances.
This decision has been made more than a decade ago and has rewarded our customers and us ever since with reliable and secure web applications and efficient development.
Moreover, while the more common components of this appstack, namely the database- and the webserver are easy to monitor with the on-board templates of Solarwinds SAM, there did not seem to be any readily available solution to monitor the specifics of the Tomcat-based Lucee Application Server.
Luckily, Lucee is based on the popular Tomcat application server, which in turn is supported by Solarwinds SAM almost out of the box. However, the default flavor of Tomcat, which ships with any Lucee installation, has been deprived of the Tomcat Manager functionality that would otherwise enable the in-depth monitoring.
This makes it a little harder to actually implement Lucee monitoring in practice, but it is still possible and highly recommended to get the most out of your Solarwinds platform. In the following we will go through the steps necessary to enable the Tomcat status page in your Lucee instance, discuss settings that should be considered and quickly cover the Solarwinds side of things. Before we begin, for the sake of transparency: This article has been written in 2019 and covers Lucee 4-5 in Ubuntu 16.04.
Getting the Tomcat Version
To get started, we first need to acquire the version of Tomcat that is currently being employed. To do this, navigate your console to the tomcat/lib folder inside your Lucee installation (usually /opt/lucee) and run the following command to print out the version information:

> cd /opt/lucee/tomcat/lib
> /opt/lucee/jdk/jre/bin/java -cp catalina.jar org.apache.catalina.util.ServerInfo
It is important to note that the path preceding the above-mentioned command also needs to be adapted to suit your Lucee installation path.
This will give you a quick overview of your java/tomcat environment inside your Lucee installation.
Before we begin installing the Tomcat Manager back into Tomcat, please make sure that the Lucee Server Service has been stopped.
Install Manager Filessudo service lucee_ctl stop
Now we need to acquire the tomcat manager webapp that is missing in Lucee and install it. To do so, go to the Tomcat server homepage and download the major release according to the version reported under “Server number” – in this case Tomcat 8:
https://tomcat.apache.org/download-80.cgi
While you’re at it, you might want to consider updating the release of Tomcat in Lucee, which is an important part of every maintenance schedule that is dedicated to keeping your Lucee environment clean and safe. In another article, we will cover the necessary steps for this procedure.
Download it in your favorite archive format and extract it to a temporary location like so:
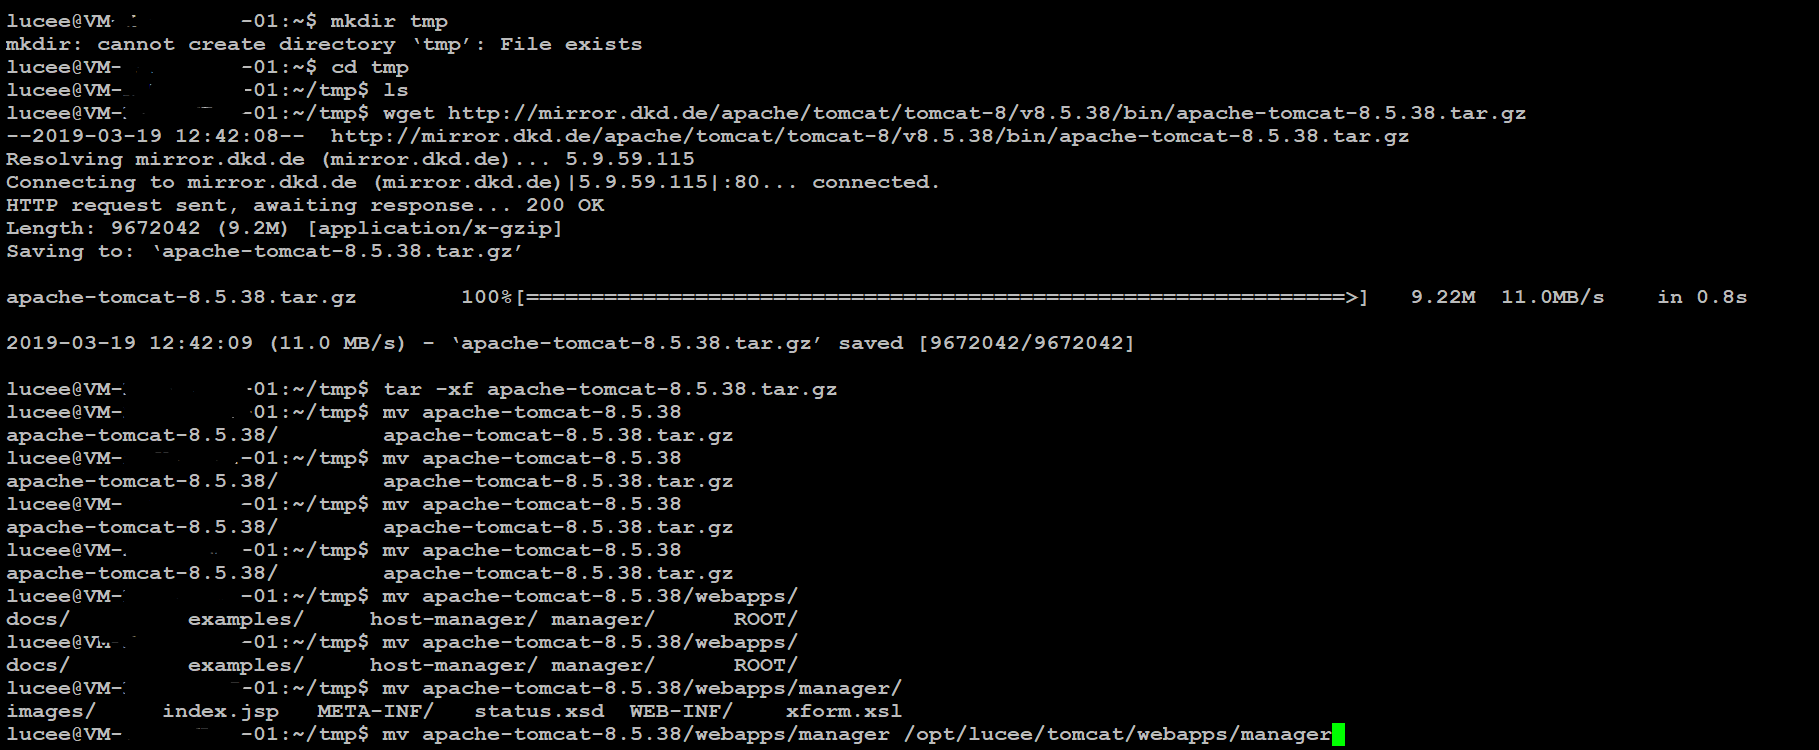
Then proceed to move the webapps/manager folder from the extracted files to your lucee/tomcat/webapps/manager – keep in mind that the user your Lucee instance runs under needs to own and access the files extracted.
Set up credentials
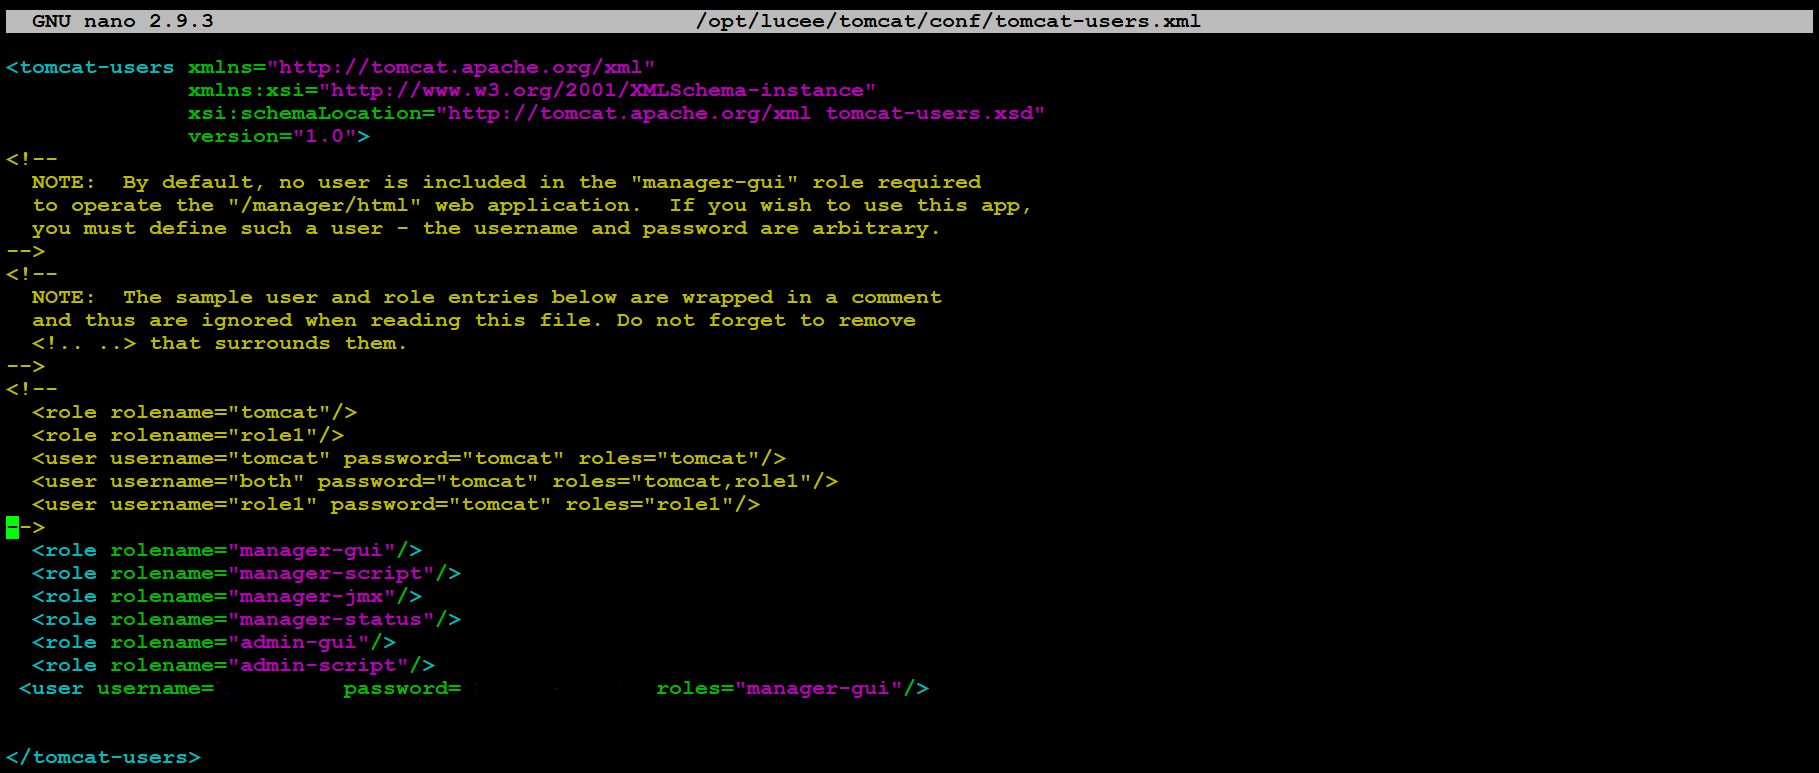
Next we will need to configure the credentials required for accessing the Manager Webapp we just installed. To do so, open /opt/lucee/tomcat/conf/tomcat-users.xml in your preferred editor.
Here we need to define the Tomcat manager access roles and a respective credential.
Paste the following into your editor, just above the closing tomcat-users tag at the end of the file:
Don’t forget to change the username and password to something safe, please. Certain common usernames like “admin” might be prohibited by tomcat for security reasons.<role rolename="manager-gui"> <role rolename="manager-script"> <role rolename="manager-jmx"> <role rolename="manager-status"> <role rolename="admin-gui"> <role rolename="admin-script"> <user password="password" roles="manager-gui" username="monitor"> </user></role></role></role></role></role></role>
Once completed, the end of your tomcat-users.xml should look like this:
This XML file now needs to be configured to act as the user authentication database for Tomcat. For this to work you need to edit the file /opt/lucee/tomcat/conf/server.xml. Add/uncomment the following entry under GlobalNamingResources:
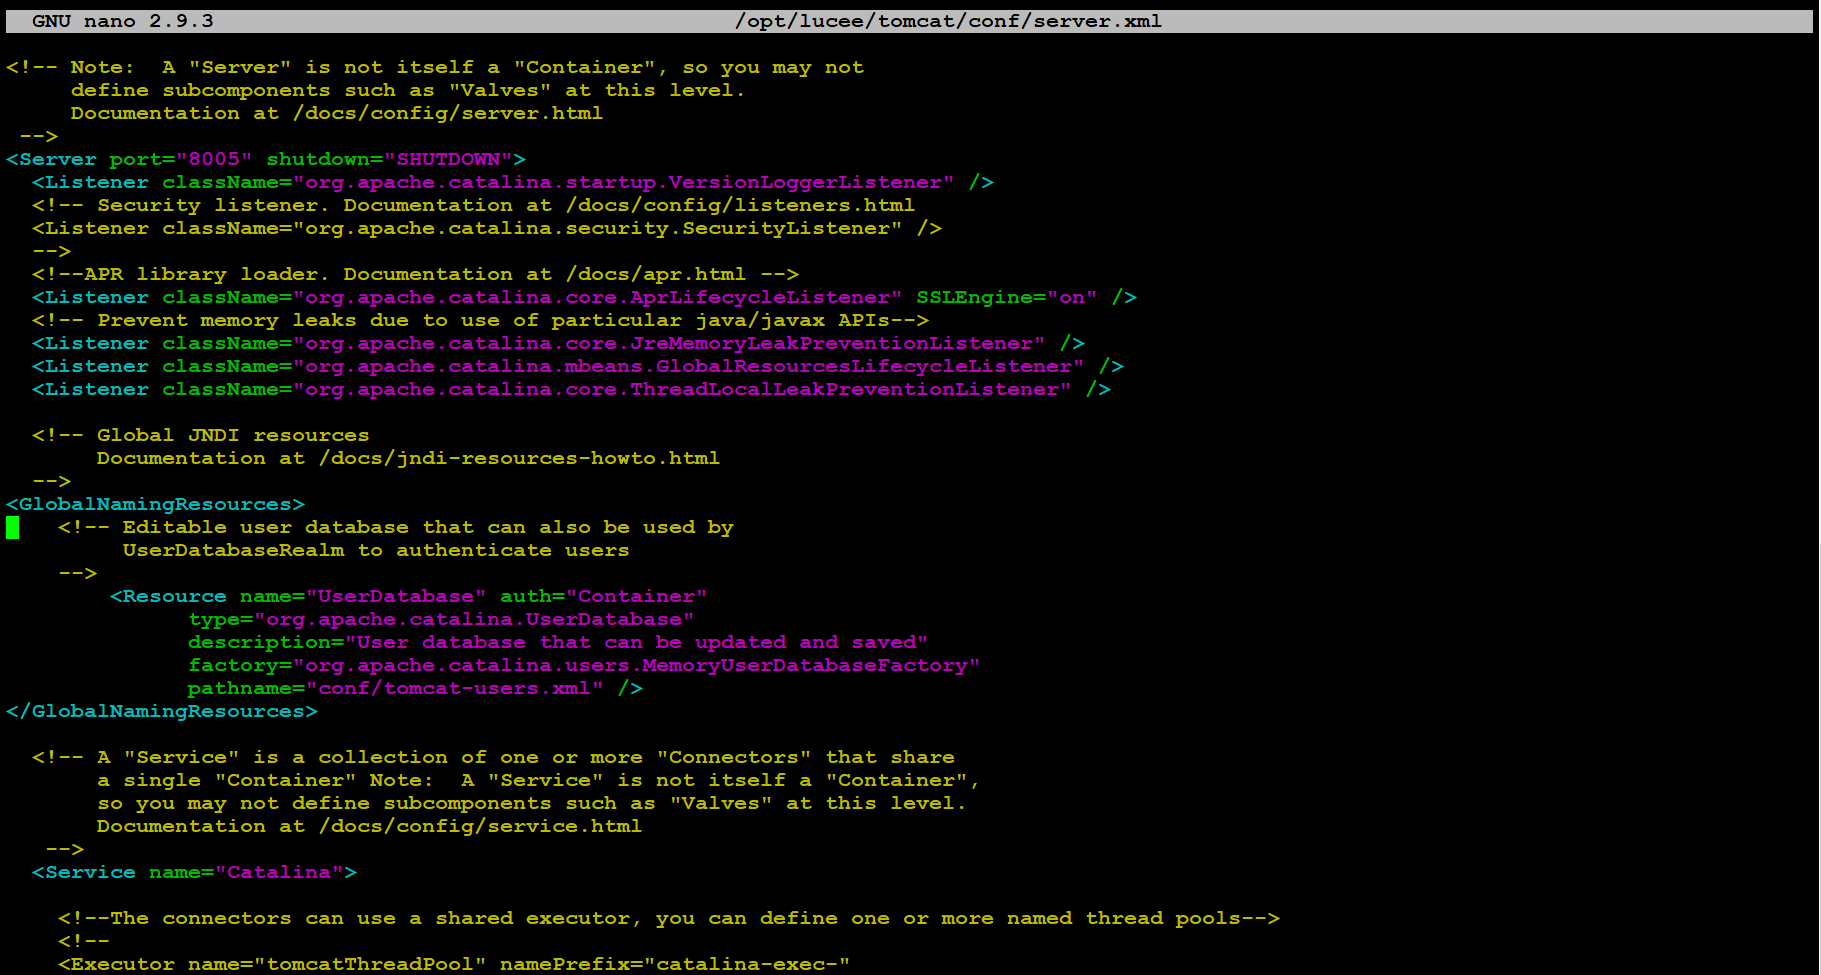
<GlobalNamingResources>
    <!-- Editable user database that can also be used by
         UserDatabaseRealm to authenticate users
    -->
    <Resource name="UserDatabase" auth="Container"
              type="org.apache.catalina.UserDatabase"
              description="User database that can be updated and saved"
              factory="org.apache.catalina.users.MemoryUserDatabaseFactory"
              pathname="/opt/lucee/tomcat/conf/tomcat-users.xml" />
</GlobalNamingResources>
Solarwinds will access the Manager through the HTTP connector, so make sure that it is configured to allow access from inside your private network in your
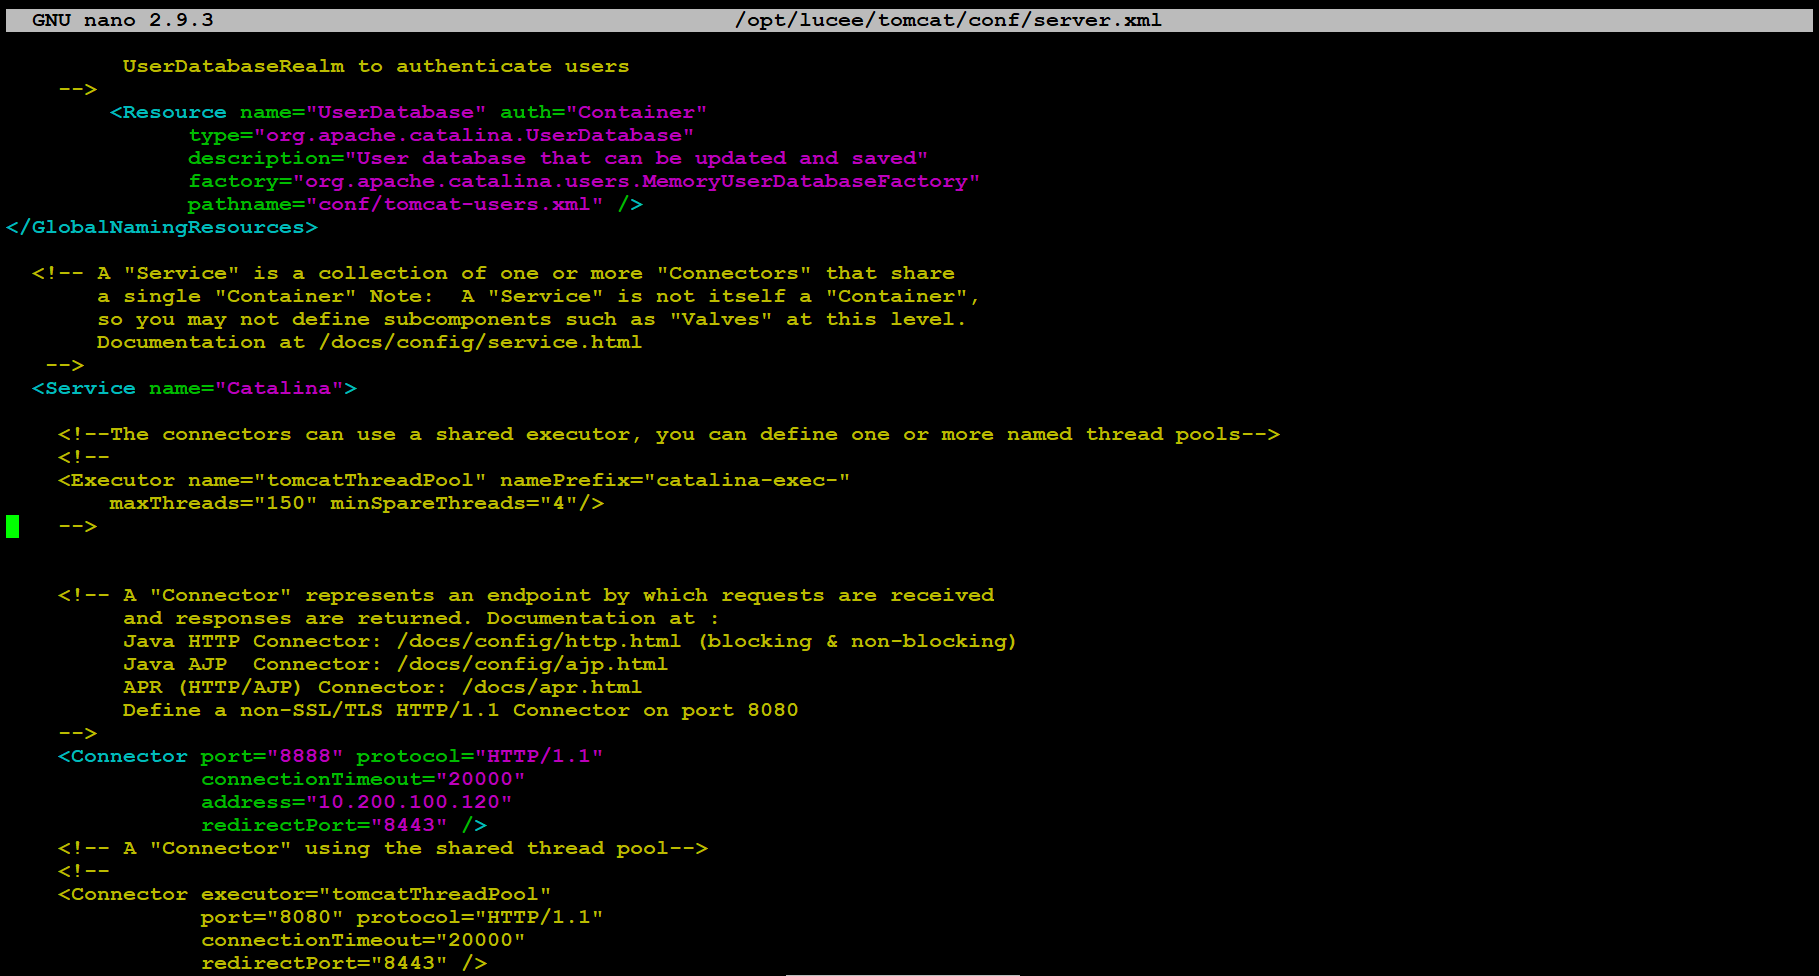
To complete the Tomcat Manager setup we now need to define which machines should be able to access it’s functionality, based on IP addresses.
Edit the file /opt/lucee/tomcat/webapps/manager/META-INF/context.xml
Be careful not to accidentally lock out any reverse proxy that you might have set up to connect on localhost via that port.
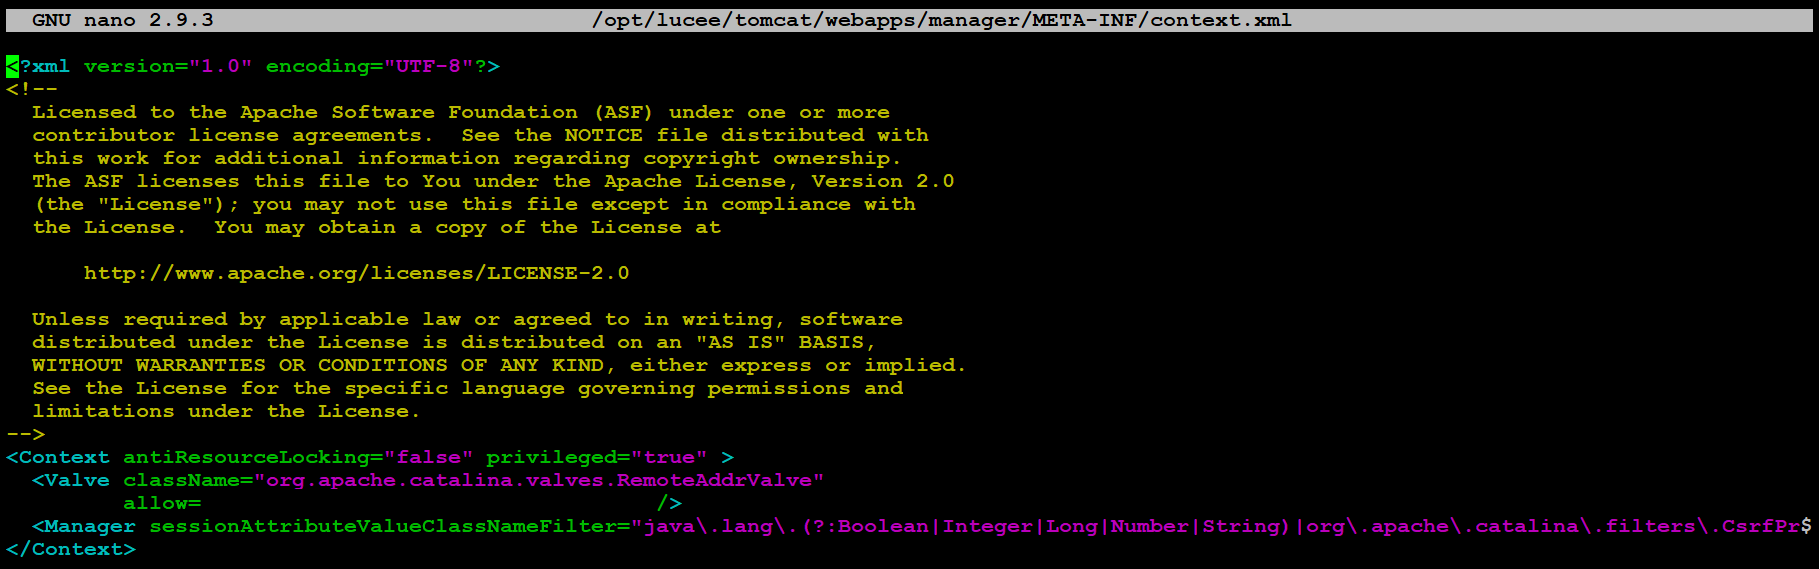
  <Context antiResourceLocking="false" privileged="true" >
    <Valve className="org.apache.catalina.valves.RemoteAddrValve"      allow="127.0.0.1|192.168.0.1|192.168.0.100" />
    <Manager sessionAttributeValueClassNameFilter="java\.lang\.(?:Boolean|Integer|Long|Number|String)|org\.apache\.catalina\.filters\.CsrfPreventionFilter\$LruCache(?:\$1)?|java\.util\.(?:Linked)?HashMap"/>util\.(?:Linked)?HashMap"/>
  </Context>
Now restart your Lucee server. If everything was configured correctly, you should be able to reach the Tomcat Manager Website under 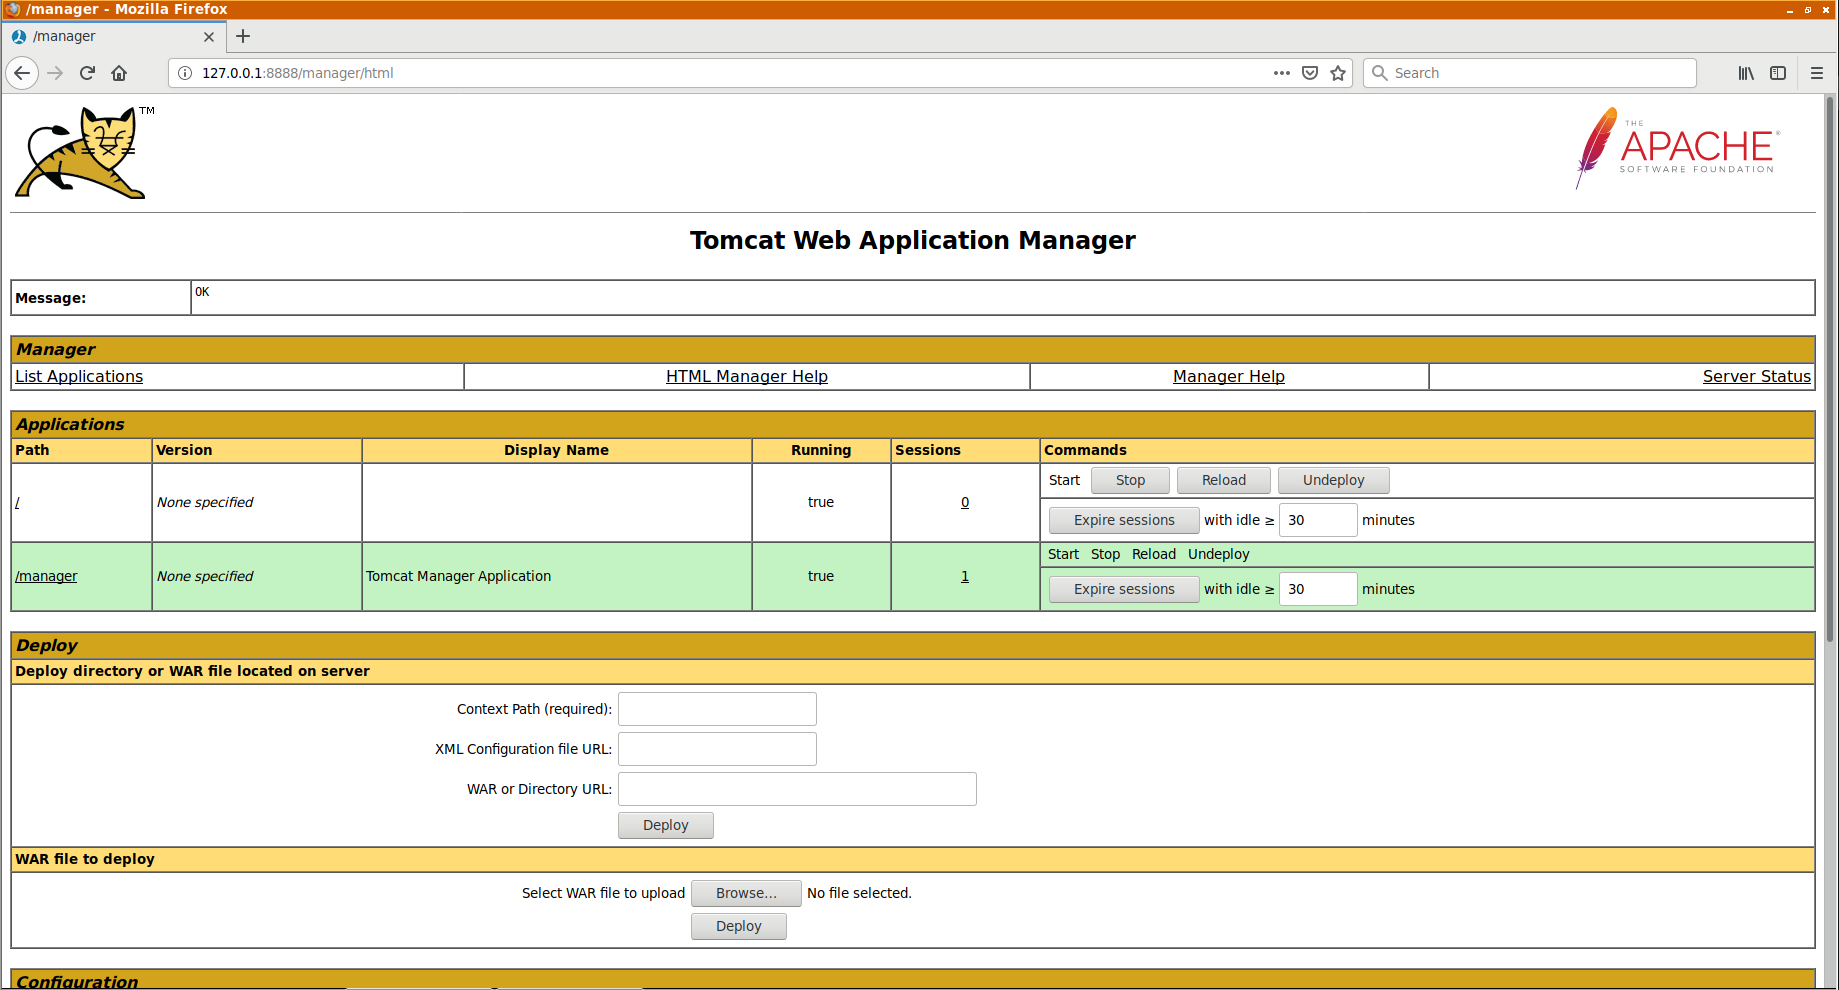
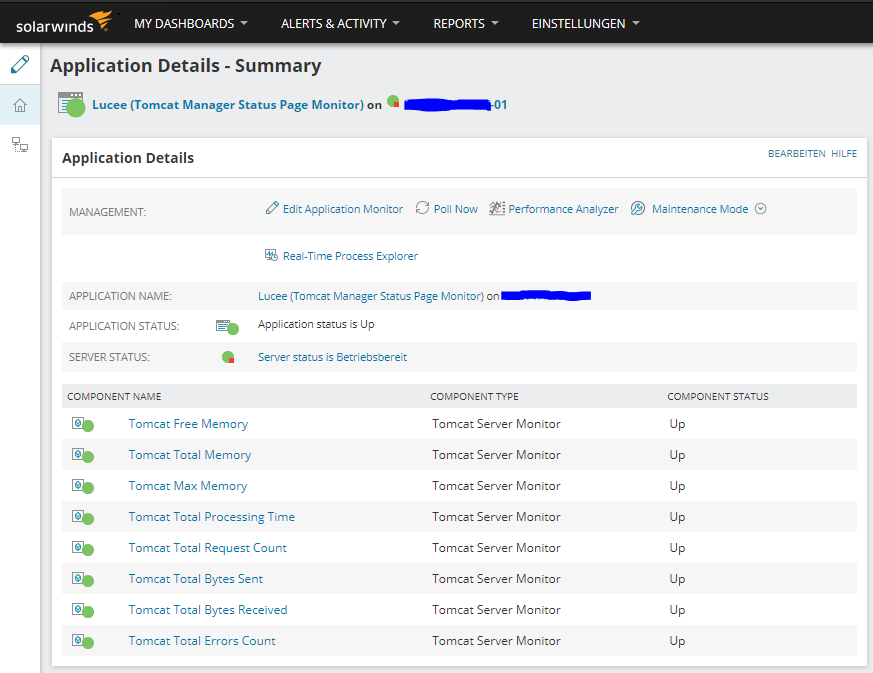
The default Solarwinds Application Monitor template needs a little touch here and there to get it to connect to Lucee’s newly added Manager Webapp. To spare you all the tedious work and get you started right away, I have enclosed an apm-template file, which you can import into your Solarwinds instance to monitor Lucee’s status using Solarwinds Server and Application Monitor ‘SAM’.
Under the following link, you can refresh your memories in case you are unsure on how to import the template:
https://support.solarwinds.com/Success_Center/Server_Application_Monitor_(SAM)/Knowledgebase_Articles/Import_or_export_application_templates
Have fun monitoring your favorite application servers!
Kai from heureka
